With my new addiction, I made the the mistake ??? to install Home Assistant, and wanted a thermometer and didn’t have any temperature sensor. But I remembered that the RP2040-Zeros in my drawer and the fact that they had internal temperature sensor.
After a short internet search I found learnembeddedsystems’ blog especially the article titled “RP2040’s On-Board Temperature Sensor”.
Code
Pico-SDK Installation
After opening the Pico-SDK Quick-Start Guide, I realised that their just was a AUR package, so after running yay -S pico-sdk and setting up the build environment i was done.
The Temperature Sensor
float get_temp() {
    const float conversion_factor = 3.3f / (1<<12);
    return 27 - (adc_read() * conversion_factor - 0.706) / 0.001721 + OFFSET;
}
This is a direct reference to the learnembeddedsystems blog and the RP2040 Datasheet temperature formula. $$ T = \frac{V - 0.706}{0.001721} $$ I calculated an offset using a real thermometer, after waiting for the chip to warm up and figured out that a $-5.5^{\circ}\mathrm{C}$ offset gave me a good enough estimation on my board.
Home Assistant Configuration
After struggling with Home Assistant config and reading the documentation, I came up with this configuration.yaml.
# Raw sensor data
sensor:
  - platform: serial
    serial_port: /dev/ttyACM0
    baudrate: 115200
    name: pico_temperature_raw
    value_template: "{{ value | trim | float(0) }}"

# Treated data
template:
  - sensor:
      - name: "Pico Temperature"
        unique_id: pico_temperature
        unit_of_measurement: "°C"
        device_class: temperature
        state: "{{ states('sensor.pico_temperature_raw') | float | round(1) }}"

# Do not record the raw data
recorder:
  exclude:
    entities:
      - sensor.pico_temperature_raw

Extras
After finishing the main the main features I added two more :)
Colored LED
float get_temp_frac(float temp, float lower, float upper) {
    return (temp - lower) / (upper - lower);
}

uint32_t color_from_temp(float temp) {
    float t;

    uint8_t r;
    uint8_t g;
    uint8_t b;

    if (temp < TEMP_LOW) {
        t = get_temp_frac(temp, TEMP_LOWER, TEMP_LOW);
        r = 255 * (1 - t);
        g = 255 * (1 - t);
        b = 255;
    }
    else if (temp < TEMP_NORMAL) {
        t = get_temp_frac(temp, TEMP_LOW, TEMP_NORMAL - TEMP_LOW);
        r = 0;
        g = 255 * t;
        b = 255 * (1 - t);
    }
    else if (temp < TEMP_HIGH) {
        t = get_temp_frac(temp,- TEMP_NORMAL, TEMP_HIGH);
        r = 255 * t;
        g = 255 * (1 - t);
        b = 0;
    }
    else {
        r = 255;
        g = 0;
        b = 0;
    }

    return ((uint32_t) r << 8) | ((uint32_t) g << 16) | (uint32_t) b;
}

void update_led(float temp, bool cicle, PIO pio, uint sm) {
    uint32_t color = 0;

    if (temp <= TEMP_HIGH || cicle) {
            color = color_from_temp(temp);
    }
    pio_sm_put_blocking(pio, sm, color << 8u);
}
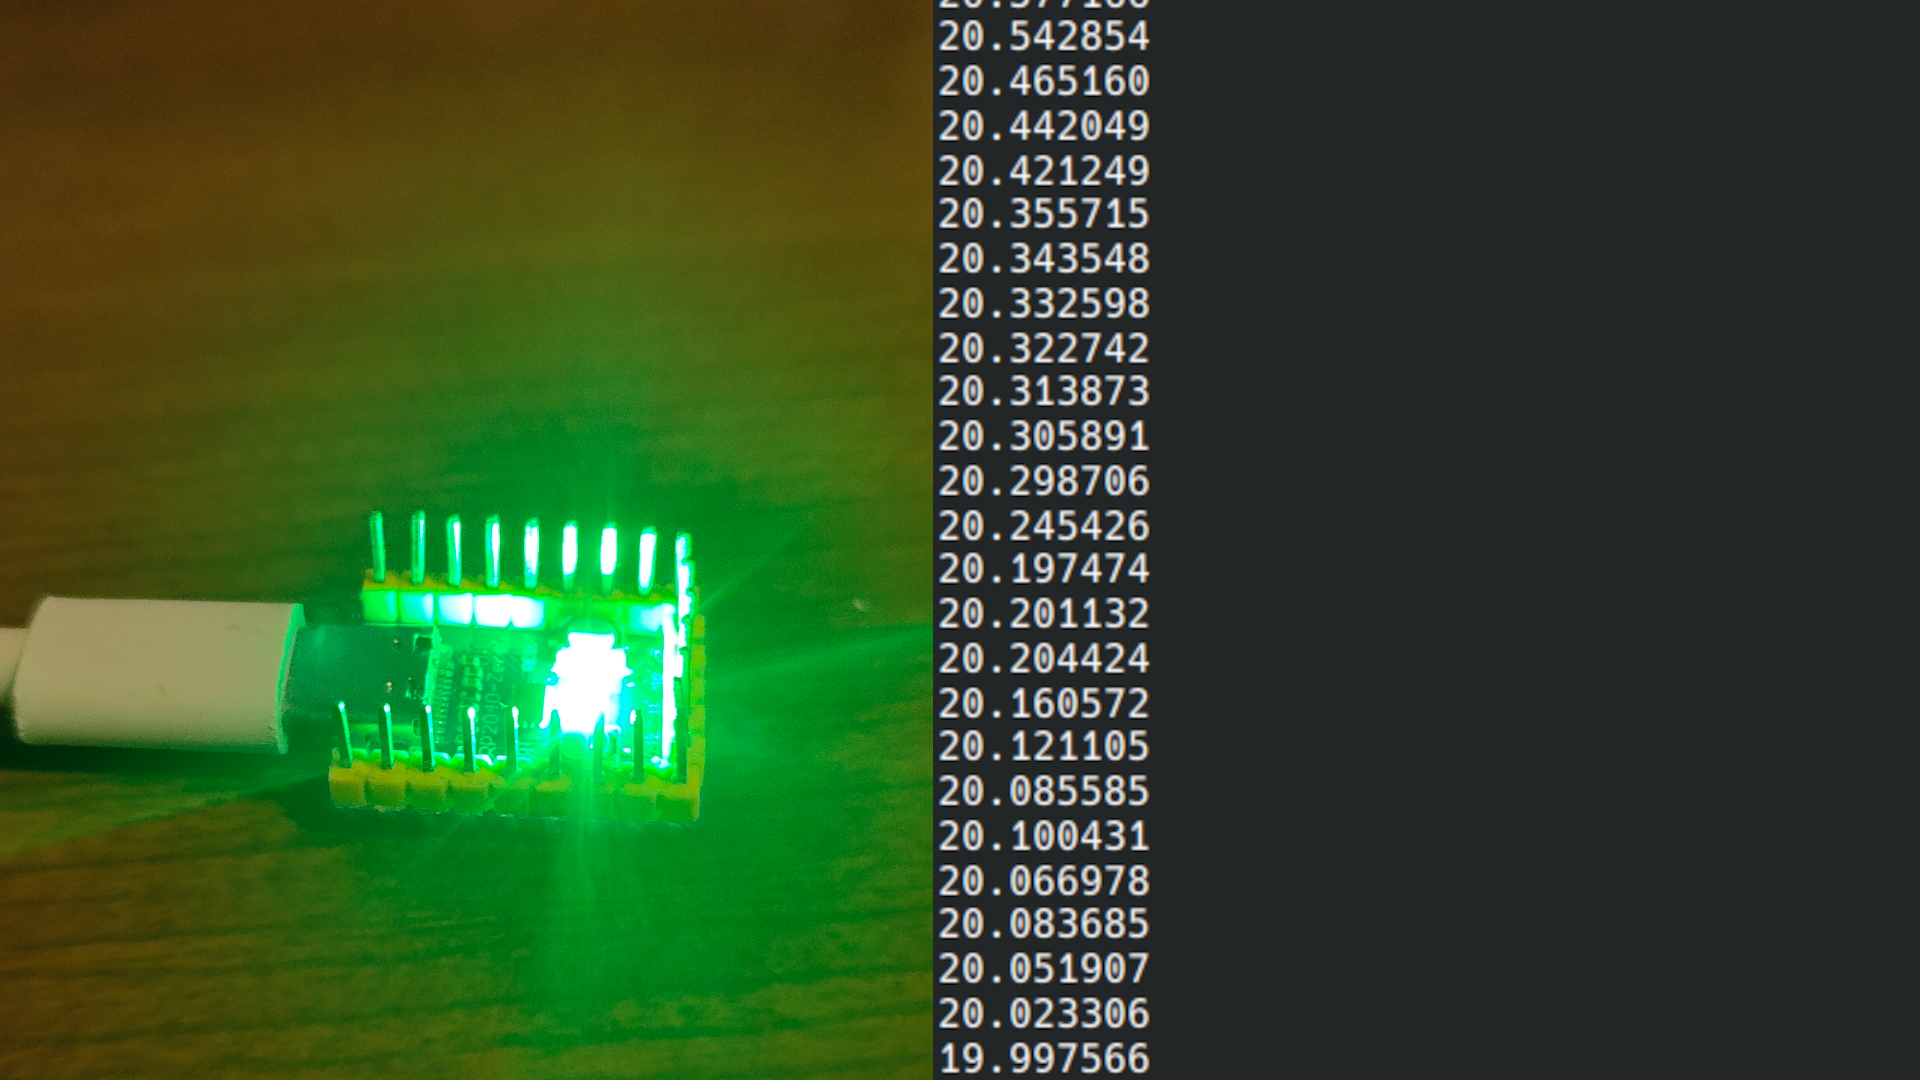
As the RP2040-Zero has a built in WS2812 LED, I decided to make it’s color transition depending on the temperature:
| Temperature | Color |
|---|---|
| $0^{\circ}\mathrm{C}$ | White |
| $10^{\circ}\mathrm{C}$ | Blue |
| $20^{\circ}\mathrm{C}$ | Green |
| $30^{\circ}\mathrm{C}$ | Red |
| $\gt30^{\circ}\mathrm{C}$ | Blinking Red |
Rack Mount
I also made a rack mount for the RP2040-Zero, to nourish my homelabing addiction :)


Sources and Inspiration:
- Git Repository and Release: https://github.com/HandyBaile/pico-temp
- Pico-SDK Quick Start Guide: https://www.raspberrypi.com/documentation/microcontrollers/c_sdk.html#quick-start-your-own-project
- RP2040 Datasheet: https://pip-assets.raspberrypi.com/categories/814-rp2040/documents/RP-008371-DS-1-rp2040-datasheet.pdf?disposition=inline
- WS2812 PIO: https://github.com/raspberrypi/pico-examples/blob/master/pio/ws2812/ws2812.pio
- Home Assistant Serial: https://www.home-assistant.io/integrations/serial/
- Home Assistant Templating: https://www.home-assistant.io/docs/configuration/templating/#processing-incoming-data
- learnembeddedsystems’ article: https://learnembeddedsystems.co.uk/using-the-rp2040-on-board-temperature-sensor